Hopeful Thoughts


The Christmas Show 2013

I’ve been busy working on my stock for this year’s Christmas Show. We’ve had some weather in our area and we’ve had to postpone to Wed. December 11. If you can’t make it, here’s a preview of what I will have available.

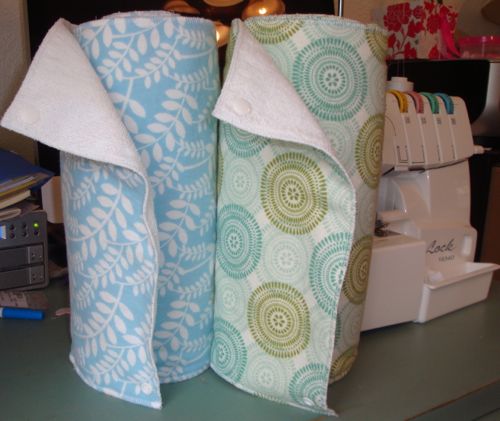
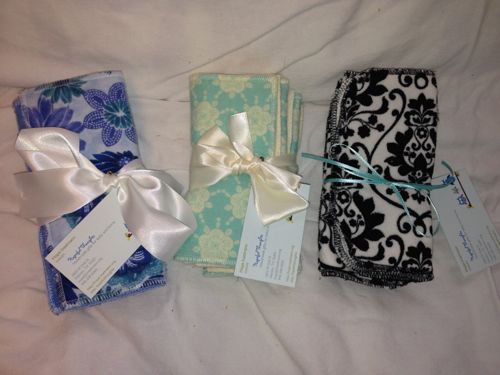
Un-paper towel rolls.
These measure about 12in X 13in like a standard paper towel and are made of soft cotton flannel in adorable prints and backed with a coordinating terry cloth. They are super absorbent and can be used nearly anywhere you would use a paper towel, but without the waste. $45

Smaller sets of 6 un-paper towels stacked and ready for giving. $20

Not big on taking the time to roll your un-paper towels? Here is the solution! The same super soft absorbent towels simply stacked. $40 each.

Can't make up your mind what you're favorite print is? These single un-paper towels can be mixed and matched to your heart's content! $3.50 each or 6 for $20.

These are miniature versions of the un-paper towels. They measure just under 7 inches and can be used for all sorts of household tasks. There are 5 in each set. $4

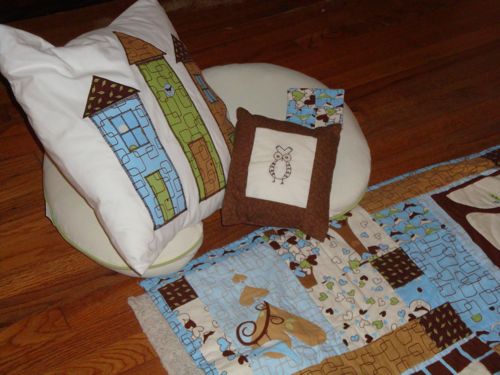
These nap mats are awesome and feature removable 1 inch foam padding and pillow for easy washing. The blanket is super soft and the whole thing rolls up and snaps for easy carrying. $65

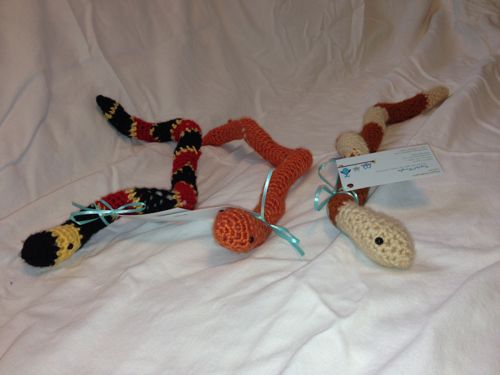
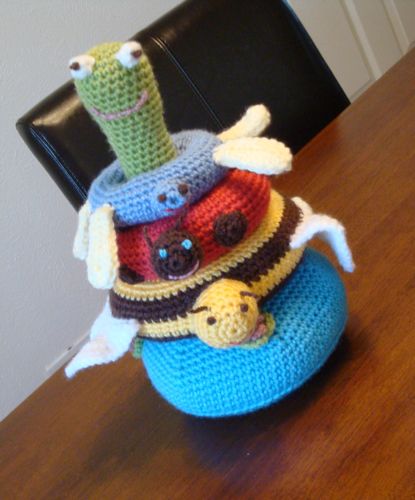
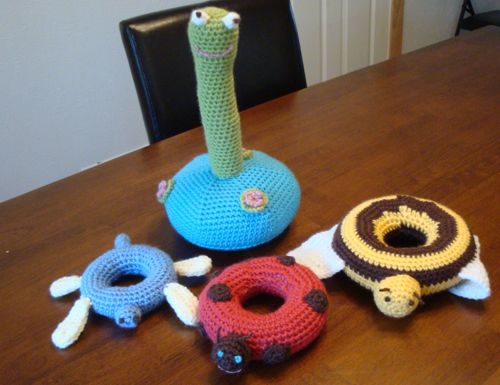
Snakes! These cute little guys can be yours for $10 each.

20 piece matching set, choice of shapes or flowers. $15

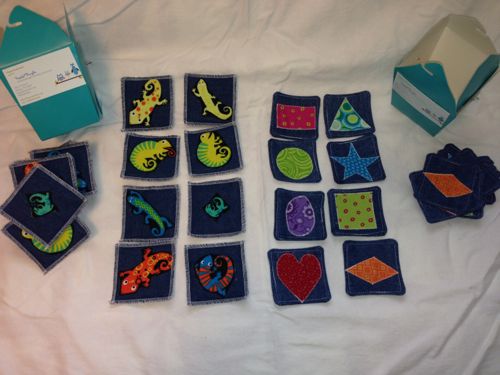
16 piece matching set, choice of lizards or shapes. $12

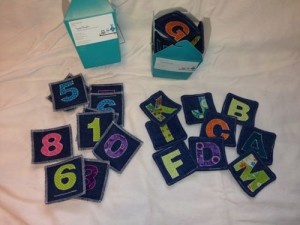
Letter or Number learning sets. Numbers are 0-9 for $8 and the Alphabet is $20

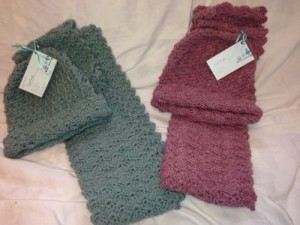
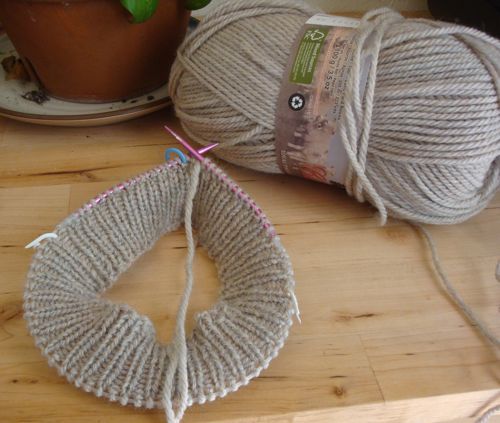
Hat and Scarf sets for women. Wool and Acrylic blend and super warm (I have a set just like these that I LOVE). $25

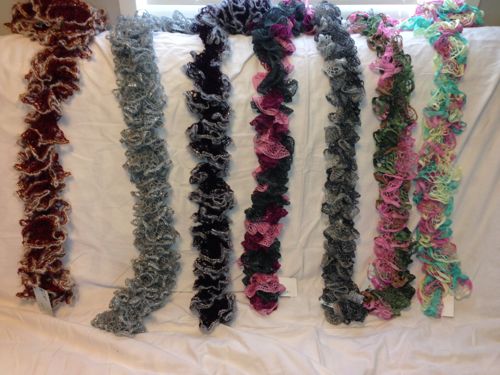
Fun ruffle scarves. Super long to wrap and wear however you like. $14 each

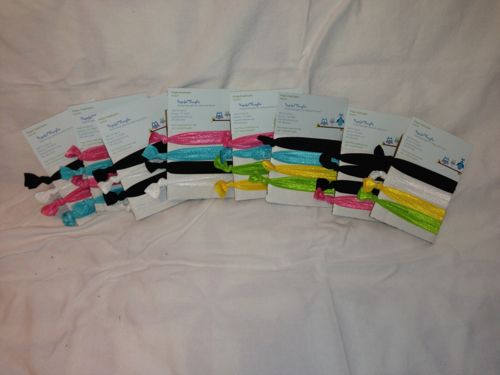
Simple elastic hair ties in cute color varieties. $5 per set of 4 ties.

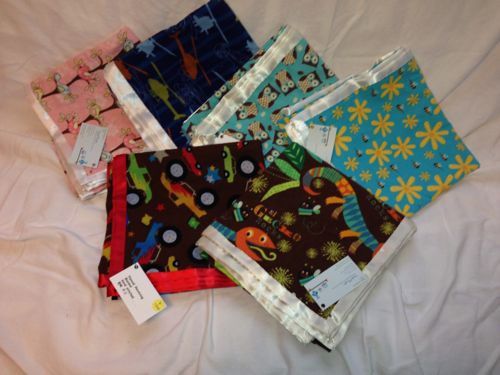
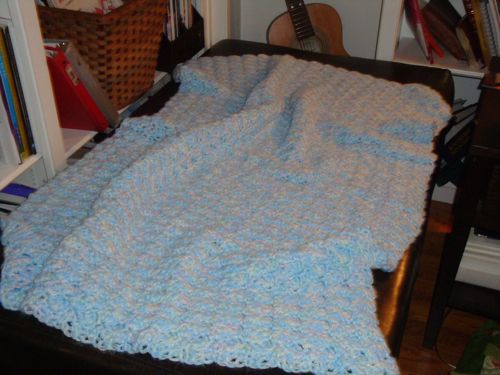
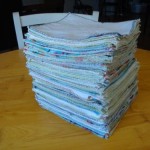
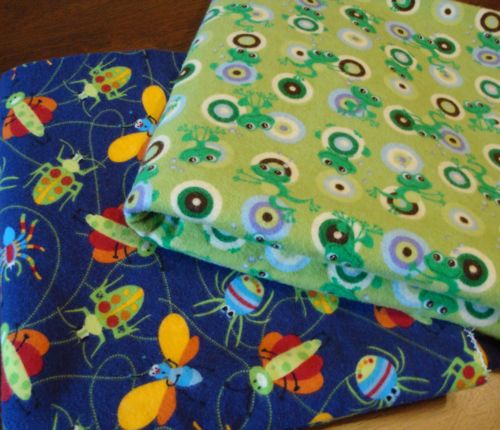
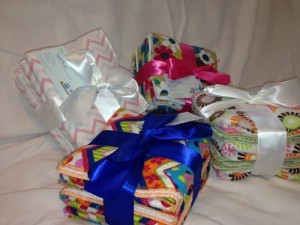
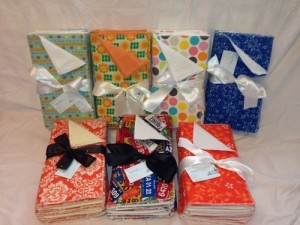
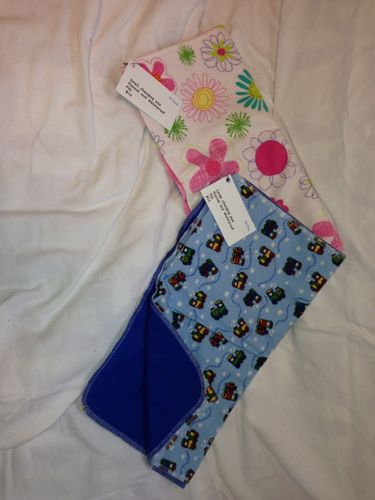
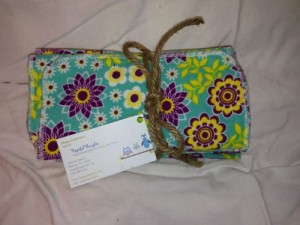
Hand stitched flannel receiving blankets. These are truly a labor of love and priced great considering the time put in to each one. The perfect gift for a new little one. $18

Machine stitched flannel receiving blanket. $16

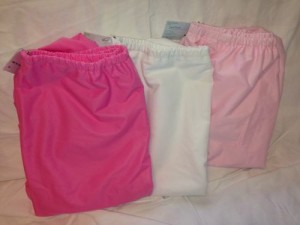
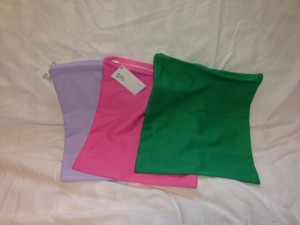
These Diaper Pail liners will fit a 13 gallon trash bag or any standard diaper pail on the market. $16 each

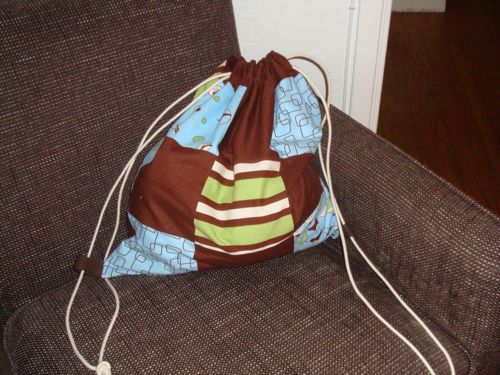
Water proof "wet" bags with handy snap loops and zipper closure. $12 for the dino print, $11 for the solids.

Wet bag
$10

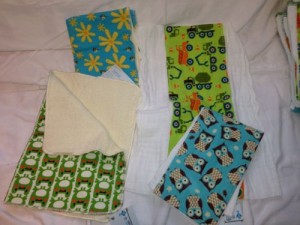
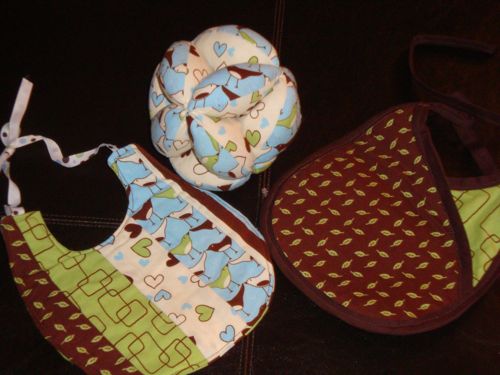
Small burp cloths in your choice of terry backed flannel or light weigh pre-fold diaper. $5

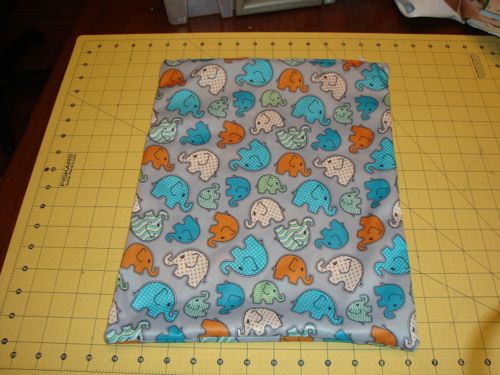
Waterproof changing pads in two sizes. $12 for the small and $15 for the large
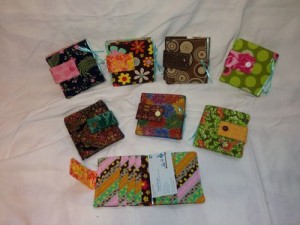
Wallet
$15

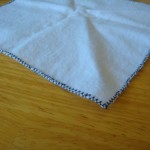
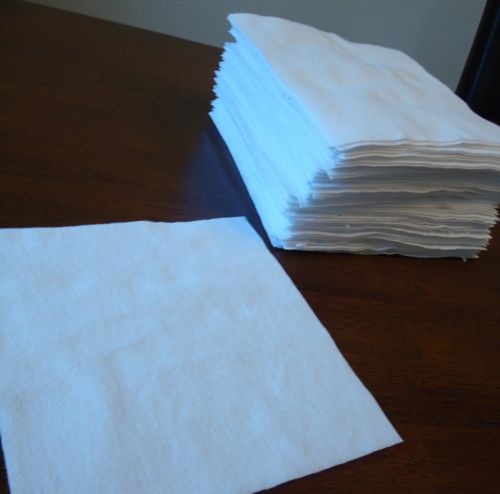
These flannel cloths measure about 8 inches and can be used for tissues, baby wipes, glasses, or any other job that requires super soft reusability. This set of 24 is $10.

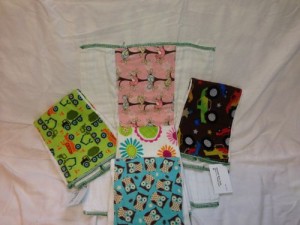
These oversized burp cloths are made with the best cotton pre-fold diapers I know of. They are big enough to use as a changing table pad. $8

Busy Bee, Sales Galore!!

I’ve been SEW busy with the sewing business over the last few weeks. I’ve even added a few items to the ever growing list of what I can do. Here’s what I’ve been up to lately!

I am now officially making the rolled towels for sale. I modified the pattern a bit...they are simply serged around the edges instead of turned a top-stitched. I think this makes a much nicer final product. The blue branches headed off to Florida and the swirls are in New Jersey. Whoa! National delivery!!

Cute Elephant wet bag. LOVE IT!

Projects Galore! Not a Paper Towel.

People are always asking me if I’m on Pinterest yet. Nope! And I plan to keep it that way. Why? I’m not opposed to the concept. In fact, it’s a great idea. The reason I stay clear is because if I see a project, I HAVE to try it, and I manage to find enough ideas through needs I see in my day-to-day life or simply stumbling upon them as I visit other sites. Take this one, for example. Last week I realized I was out of white caps for snaps. I had to order more, and while I was on the site, I noticed a link to “101 uses for KamSnaps”. I HAD to look! And here is the link that caught my eye

Of course I HAVE to make these “un-paper towels”. And so I did!

My finished roll of towels.

A single towel

The recipe called for two yards of flannel and two yards of terry to make 13 towels. Flannel was on sale this week at $2.99 a yard, and I got my terry with a 50% off coupon and scored an extra 23 of a yard from the end of the bolt. I spent $10.66 on terry and was able to cut 16 towel size pieces from it. It took about 30 sets of snaps (about $1.50 worth) and I had to buy a piece of plastic canvas for $1.79, but I think I’ll get four rolls from it. So, the project cost me around $17 (could have been double without sale prices). Oh…and I should factor in the cost of my machine…which I BROKE in the process. I don’t know yet how much it’s going to cost to replace the knife on my serger. 🙁

Pros of this project are that it’s pretty easy to put together and the towels are really pretty and practical.

Cons are a bit more involved. There seemed to be quite a bit of waste in pieces that aren’t really big enough to re-use. I was able to make 8 baby wipes from the leftover flannel, but the remaining pieces are too small to make anything that I’m aware of, as were all the terry scraps. (I’m pondering this problem, and I DO have some ideas…another reason I don’t need Pinterest!!) Also, I felt like the finished towels are really too thick to look nice rolled up. By the time I got the last towel snapped on, the roll was too big for it to fit all the way around. In addition, it took about 6 hours to cut and sew it all. (Not sure how much time the serger would have saved me since it broke on the third one!)

Overall, I like this project and I think that it is something I will make in the future, however, I’m going to try a thinner option for the terry layer. I’m leaning towards organic hemp French terry which would cost about $15 per set of 13. It’s more expensive, but I think the result would be well worth the extra cost. Not sure yet if I will add it to the list of items on Hopeful Thoughts (need to seek permission from the creator), but it’s definitely in the list of gift items!

Better Late than Never: Tribute to Fellow Crafters

Almost a year ago, I took a bunch of pictures to post on my blog. A sweet lady in my church launched a quest to get the other crafty ladies to band together to create matching handmade gifts for Grayson. She found an adorable fabric collection called “Chirp.” I received SO many cute things, and we have gotten so much use out of everything over the past year. So, here they are for all to enjoy.

The inspiration for all my diaper crafting. Two wet bags, two diaper pail liners, and a cute little water proof changing pad. All crafted by G's Aunt Bee.

Unique circle blanket crocheted by my dear friend Bethany. This size and shape was PERFECT for the stroller and the car seat. Not to mention keeping little guy warm for naps without having too much bulk around his face.

Quilt, pillows, and coaster made by Colleen (special mention to Megan who designed the owl on the little pillow). There was a lot of "tummy" time spent on the quilt, and the pillow and coaster were indispensable for nursing.

Hand-hemmed receiving blanket made by G's Grandma on his Daddy's side. Extra large size made this a perfect swaddling blanket.

Great Granny Gwen did the needlework on this cute little quilt. This got some tummy time, too!

OMG! Cutest diaper bag EVER!!!! Keri is amazing! Came with a burp cloth and extra bag to tuck inside.

Super cozy crochet afghan crafted and sent by my high school BF. G loved the weight of this all winter long, and still loves to cuddle with it! I'm so excited I get to return the favor and craft for her expected little one!!!!

Miss Lori made this colorful, useful little knapsack. It's served as diaper bag for air travel, and overnight bag to Grandma's. I expect G to get lots of use out of this over the years.

The satin lined receiving blankets are a family tradition. My Granny made them, and then my mother, and now my sister and I both make them as well. Here are the two that G's Ma (my mom) made for him. Jungle animals and Little Boy Blue.

Last, but not least, the beautiful work of Miss Vicki, the brains behind the whole craft crusade. Reversible bibs, a grab ball (oh my! What a lot of pieces to stitch together!) and a sheet for the pack n play (not pictured).

I am so blessed to have friends and family who would spend their precious time to create gifts with their own two hands rather than quickly buy something. LIfe is hectic, and spare time is sparse. These are gifts crafted with love, and I love the givers. Thank you all.

Crafting in Between

As I have a few minutes here and there, I’ve been working on a few crafty things since G’s arrival last year. I’ve continued to make the flannel receiving blankets, but I was forced to cut back on my crochet and knitting due to some pretty painful postpartum carpel-tunnel syndrome. I have a few projects on hold that I hope to get back to, but this post is about my newest focus: sewing.

I was fascinated by the diaper pail liners and wet bags that my sister made for me. When my friends Allison decided that she was going to cloth diaper her new baby, I resolved that I was going to make a few things for her. With the help of my little sis, I got fabric ordered and cranked out four diaper pail liners (2 for Allison and 2 spare for myself) and 4 cute little wet bags.

Upon seeing how cute these turned out, I kept going back to the site where we ordered the fabric, Kids in the Garden, and just looking. The lady who runs it makes and sells cloth diapers. She also sells a couple of patterns for making your own. I’d noticed LOTS of sellers on Etsy who make cloth diapers. It was so tempting, but I was completely freaked out by the idea. The idea of working with the elastic scared the heck out of me.

Eventually, curiosity got the better of me. I HAD to try. So, I ordered a pattern (The Nikibaby One Size Diaper)… it was less than $10. I purchased some cute fabric, and a set of snap pliers with plastic snaps.

Yes, the elastic is a super big pain, but it turned out not to be as difficult as I’d expected, and I quickly cranked out this cute little number:

I was SOOOOO excited! Here’s a shot of my little guy modeling it. Sorry for the bad photo. It’s really hard to get him to stop moving!!!

After getting comfortable with this pattern, I thought about how to modify it to make a cover for pre-folds. I took some measurements of the covers I had around the house and made a pattern. Putting the diapers together turned out to be another challenge, as there is the added difficulty of binding the edges with fold over elastic (FOE). After 3 attempts, I finally got it down in time to make a gift for my friend Paige. Wish I had a picture of that one, but here is G in one of the first attempts:

Making diapers has turned out to be a lot of fun. You can do so many creative things. If you are a wanna be cloth diapering expectant mom and a friend of mine, expect some cute “fluff” in your baby gift!

A Year in Review

Come Friday morning when I wake up, the little guy that snuggles next to me each night will be a full blown one-year-old. As I consider how quickly the time has flown, I’m also blessed to reflect on what has transpired in the last year of our lives.

July 29, 2010 at 5:40 in the morning, after nearly 24 hours at Inanna, Grayson emerged into our lives with my little sister and my best friend standing by. In the days and weeks that followed, we were showered with love from visitors. We hosted my entire immediate family…(Mom, Dad, sister, 2 nieces, nephew), with the exception of my brother in law, but including my parents dog. Ryan’s sweet mother was waiting patiently in her car, already in town, for the moment’s notice to come and see her new grandson. To top it off, several families in our amazing little church brought us meals.

We settled into a little routine and in September, I started my little tutoring business. This kept me busy four afternoons a week, but it was a great way to be home with Grayson. Thanks to Hawley, Gus, Allison, Joey, Kaycee, Nathan, Emily, and Kim for helping make that possible by watching my little guy. The business is flourishing and I love being able to work with the kids in this way.

Ryan has continued to enjoy his job as a game programmer, though his official title is “Senior Software Engineer”. He started in September of 2009 at Bonfire Studios (while I was in Argentina). In October of 2010, Bonfire was bought out by Zynga, providing more stability to his position.

Just before Grayson was born, we closed on our house. We’ve experienced lots of ups and downs during Grayson’s lifetime, though we are so glad to be in a house with the little guy around. In September, we were able to put our home buyers’ credit to work and pay for a complete replacement of our HVAC. Then, we turned around and spent whatever rebate we got from that overhaul on a brand new water heater when the old one exploded in December. The joys of an old house! Our AC unit was 35 years old, the furnace dated almost as old as the house, and the water heater was over 20 years old. Recently we’ve had the roof patched from wind damage, and replaced a belt on the tenant’s dryer. I think we need the kitchen drains worked on next.

We have been able to get some work done improving the house in addition to all the repairs. Grayson’s room got a fresh coat of Viking blue paint, thanks to the help of his Grandma, and it’s looking better and better as we add to it. This spring, we hired a crew to do a major overhaul on the yard. Trees were trimmed and brush was cleared and the result is impressive. Next on the list is an exterior paint job, scheduled to take place in the next few weeks, and landscaping with new sod in the fall.

The house is such a blessing. We’ve hosted two baby showers here this year, as the size and layout of our living and kitchen areas works great for big crowds. We still have great tenants in the apartment, who plan to stay for awhile. Not to mention the amazing neighbors in the houses on either side.

And speaking of babies, in Grayson’s first year, we’ve welcomed 3 new babies into our church, two new babies into the neighborhood (one right next door), and are anticipating 5 more over the next 8 months in our little church. Add to that my high school BFF, and we are just bursting with excitement over the babies!

In March, we were finally able to trade in my old car for something more safe and appropriate for mommy stuff. Goodbye rusty white 1999 Camry, hello shiny graphite grey 2011 Outback.

We live pretty far from my side of the family, but thanks to Ryan’s great job and my tutoring income, they haven’t seemed so far away this first year of parenthood. We traveled to my parents’ house for Christmas, I was able to visit my sister in MI over spring break, my mom came for a two-week visit in April, and G and I were able to meet my sister and her kids in NC in June. We’ve been blessed with 3 or 4 visits from Grandma (she’s a great babysitter) and made a couple of road trips to see her in Austin as well.

In December, our dear friends, the Rambows, returned form their stint in Argentina. We were blessed to have them back in our lives for 6 months before they left earlier this month for New Jersey. Emily kept Grayson some for me during tutoring and we are so grateful that he was able to play with their little girl.

I could go on and on about the things that have happened over the last year, but it would take forever. Of course, it would have been easier if I’d blogged all along than to try to cram it into one post anyway! Suffice it to say that it’s been an eventful time, but we are grateful for all we’ve been blessed with.

How to Make Your Own Nursing Pads

A few weeks ago my mom was telling me about my friend, Ginger, who was asking about where to get some good nursing pads. My sister had picked up some organic ones for me while she was here when my baby was born, and mom wanted to let Ginger know where they’d come from. My response was that the organic ones weren’t actually my favorites, but, in fact, I was more likely to wear the sets I had made from some scraps of flannel and terry left over from previous sewing projects. I agreed to send Ginger the directions.

I never posted about this particular project. Nursing pads seemed a bit too personal. However, at Ginger’s encouragement, here’s the “how to”.

Supplies needed:

Circular object in the size diameter you desire for your pads (Mine was about 4 inches, but I decided this was a bit too small), another circular object that is a bit smaller in diameter than the first, cotton flannel, cotton terry (if desired), white thread (a good one that won’t shrink in the wash)

Directions:

Begin by washing all your fabrics hot to make sure that your final product won’t shrink. Cut circles of flannel using the larger diameter object as a stencil to trace. If you want a thin pad, layer three of these together. If you want a more absorbent pad, cut a circle from the terry cloth in the smaller size and layer it between two pieces of flannel. Pin as needed.

Sew across the diameter of the circles 4 times as if you were slicing all the way across a pizza to create 8 “slices”. At this point, you can sew in darts. Stitch two on opposite sides of the circle. This creates a more cup-like shape.

Finish by doing a wide zig-zag stitch around the edge of the circle. I also did this on top of the darts to help them lay flat.

Wear your pads with the darts facing in so that you don’t get lines under your clothing.

Another Knitting Project Complete

soakerInProgress

With the successful completion of my sock project, I decided I was ready to take on something else knit. My sister recently decided she wanted to try wool soaker diaper covers with her 3 month old son, and it occurred to me that this might make a good next project. It’s a piece of clothing stitched in the round, but not nearly as daunting as a sweater might be. So, I went on a web search for a good free pattern. I sent a couple of links to my sister for approval, and we wound up choosing this one. You can see my finished product in this picture.

FinishedSoaker

There were points where I worried I may have bitten off more than I could chew with this project. I’m fairly certain that the pattern writer did not have quite such a newbie in mind when she wrote her directions. Fortunately, their are sites like knittinghelp.com with great video tutorials. This got me through most of the difficult areas I ran into. I really only hit two snags that I couldn’t figure out how to get around. The first was in the area of short rows.

Short rows are created when you turn around mid-way through a row of knitting to create some extra height in the middle of a piece. In this case, it causes the back of the soaker to have a bit more room than the front, which is good for chunky baby bottoms! It’s a pretty easy technique if you are just knitting a flat piece or in the round, but it’s quite common to wind up with holes on one end of the short row. I found solutions to this problem for the common situations, but I was knitting in the round with ribbing. I have been searching Google for a solution, and all I’ve been able to find are other people complaining of the same problem. I’m hoping to work it out for future projects. Here is a photo of this part of the work. You can see two small holes just to the right of the middle line of the picture. They are not obvious unless you know to look for them, but I wish they weren’t there!

ShortRowProblem

My other issue will be easily resolved the next time around. The short rows are supposed to be in the back of the diaper cover. For the majority of the pattern, there is no distinction between the front and back. The hip markers are evenly spaced around the piece. So, when the pattern said to create short rows from one hip marker to the next, I assumed that it meant to start at the first one and go to the second. This ended up putting them where the front was supposed to be, as the “start of round” should have been the back. This meant that when it came time to shape the leg openings, I had to snip the yarn and move to the other side, when I should have been able to keep working around from where I was. In the process, I didn’t get something pulled tightly enough, and I ended up with a pretty big hole smack in the middle of the back of the soaker. I didn’t get a picture of the hole, but the next picture shows the repaired spot. Next time I will start my short rows at the second marker and I think this will be avoided!

hole

I’m sure some of you are wondering about wool diaper soakers. This is not a route Ryan and I intend to take with our baby, but I can see why many people would choose to use them. You can check out the benefits at Green Mountain Diapers.

Week 21

I’ve just finished week 21 of my pregnancy, and I can’t really focus this post on all one thing. So, we’ll consider it a summary of the week!

Spring has sprung in Denton, TX and you can see the proof all over the ground and feel it in the air. The weather has been beautiful for most of the last couple of weeks. (We don’t need to mention the freak snow storm that blew threw last Sunday morning when Ryan and I were out of town at my mother-in-law’s house. That make the second snow we’ve missed this season.) On the pretty days, my neighbor, Allison, and I have enjoyed walks around our neighborhood with her dog. We didn’t have to venture any further than our front yard to see these beautiful Texas Blue Bonnets. I’ll never consider myself a Texan. I’m a Carolina girl forever, but I do love the Texas state flower.

BlueBonnets

When I haven’t been basking in the sunshine, I’ve been working to finish up some craft projects. This week saw the completion of the giant stack of baby wipes and my first real knitting project.

wipeStack WipeEdge2 wipeEdge

The wipes are simple squares of flannel that I cut and stitched around using the zig-zag function on my basic sewing machine. It should have been an easy project, but sewing machines and I do not get along well. It took me many days of sitting for just a bit at a time to get through my pile of squares. My machine constantly jams up. The thread pops out of the bobbin feeder, breaks off from above the needle, or a myriad of other issues that cause me to stop mid seam to set things back up correctly. I was SO READY to be finished.

Knitting is now one of my new favorite past times. I learned the basics several years ago and managed to make a scarf that I wore when my husband and I traveled to Russia back in 2005. I was happy to have that project done and decided I was pretty much done with knitting because it had been so difficult, and even painful. However, something was tugging at me recently to just try one more time to create socks. You may have noticed that I never posted a picture of the blue crochet socks from months ago. That’s because they didn’t shape up right and I finally pulled them out altogether. Well, today I can show you finished socks at last, but they are KNIT and not crochet! It turns out that I never really learned my basic stitches correctly, and this project allowed me to figure this out and now knitting is almost as easy as crochet. I’m looking forward to all the new types of projects this will allow me to do.

SockProgress FinishedSocks OneFinished

And finally, here’s the belly shot for the week. This was taken Friday, the end of week 21.

BabyBelly21

Half Way There!!

This week marks the half way point to the arrival of our sweet Baby Boy! I thought this would be a great time to share some of the things I have been doing to prepare for the little guy.

Pond Friends stacking toy

Pond Friends stacking toy

My first project was completed a few weeks ago while we were snowed in. I knew I wanted to crochet something, but I have lots of crafty friends and he is sure to receive plenty of fuzzy yarn blankets to keep him warm, so I opted for a plush toy. This pattern was available free from the Lion Brand web site.

Frog stand with pond base, dragonfly, ladybug and bumble bee.

Frog stand with pond base, dragonfly, ladybug and bumble bee.

I also have a few projects in the works. My little guy has to have his very own flannel receiving blankets. I’ll be getting a few of these form family as well, but you can never have too many. They wash up great after spit up or diaper blow outs and only get softer over time. Baby Boy Inselmann will get two made by his Mommy. It was so much fun to be able to pick out prints with MY sweetheart in mind! I’m currently trimming the froggy print in white and the bugs will be framed with a bright red.

blankets2Be

We’re planning to cloth diaper our little bundle, so another project in progress is flannel wipes. Here’s the stack of white flannel waiting to be trimmed in a zig-zag stitch to prevent unraveling and to add a bit of color. At the moment, I’ve only had time to trim about a third of this pile. I had to take a break to rest my back after bending over the sewing machine for two days getting the first few done! I’ll post final pictures when they are all done, as well as my thoughts on cloth diapering.

wipes

And, for those who are curious, here’s a more recent shot of the belly. This was taken Thursday, so towards the end of week 19.

belly19